Install winIDEA for Microsoft Windows
Introduction
This tutorial guides you through the the installation process of winIDEA for Microsoft Windows, and how to ensure your PC environment is primed for smooth operation.
winIDEA is available for download via website.
Configuration steps
|
Download the latest winIDEA build from www.isystem.com. |

You can download it for:
•Microsoft Windows Version 10 and newer,
•Portable and installer,
•Latest and legacy builds.
The final compatible winIDEA version for use with Microsoft Windows 7 is 9.21.20.
|
Run the installer with administrator privileges. |

|
Silent installation is possible by using the following command line switches: <winIDEA_instal_package>.exe /q APPDIR=<install directory>. For example: winIDEA9_21_0.exe /q APPDIR=c:\apps\winIDEA |
|
(recommended) Prepare PC working environment. |

Before first debugging, it is strongly encouraged to prepare your PC environment, because winIDEA creates temporary files, which are necessary for its operation. Windows updates or any other custom cleanups may corrupt these files. Per default winIDEA will place temporary files into %TEMP%/iSYSTEM folder.
If this folder does not suit your needs, define environment variable. winIDEA will place all temporary files in this folder:
1. Create a dedicated folder on your local drive, e.g. C:\ISYSTEM_TEMP.
3. Search for Edit environment variables / Environment Variables for your account via Windows search bar.
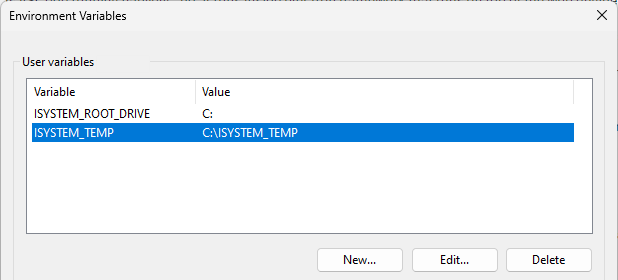
4. Click New In User variables and specify variable name and value:
•Variable name: ISYSTEM_TEMP
•Variable value: C:/ISYSTEM_TEMP
You can delete the contents of this folder entirely. winIDEA will recreate anything required for operation the next time it is started.
|
(optional) Download the appropriate winIDEA SDK and run the installer. |

isystem.connect Application Programming Interfaces (API) is not included in the installation and must be installed separately if needed.
Next steps