Install winIDEA Eclipse Plugin
In this topic:
•Prerequisites and system requirements
Introduction
In this tutorial, you will learn how to set up the necessary environment for debugging in the Eclipse IDE using winIDEA IDE. This involves installing required software, configuring your project, and creating a debug configuration.
Prerequisites and system requirements
Before starting with the installation, the system must contain the following:
Java
Java 11 or newer for Eclipse 2022-03 and newer.
Eclipse
Eclipse 2022-03 and newer.
To download the latest Eclipse go to https://www.eclipse.org/downloads/. If you want to use Eclipse for C/C++ development only, there is already a package with CDT available (Eclipse IDE for C/C++ Developers). In this case, skip CDT installation described in the next step.
After the installation is done, select a workspace and launch the Eclipse IDE.
CDT
There are different ways to install the Eclipse CDT Plugin:
•Use the Eclipse Marketplace from the Eclipse IDE. Search for CDT and install Eclipse C/C++ IDE CDT.
•Use the Update Site URL to install directly from Eclipse: https://download.eclipse.org/tools/cdt/releases/latest.
•Go to http://www.eclipse.org/cdt/downloads.php. CDT should be installed as an Eclipse Plugin.
|
It is recommended to use the latest version of the plugin and winIDEA available. |
Installation steps
Some IDEs have already included the Plugin. If the Plugin is already installed, the next steps can be skipped.
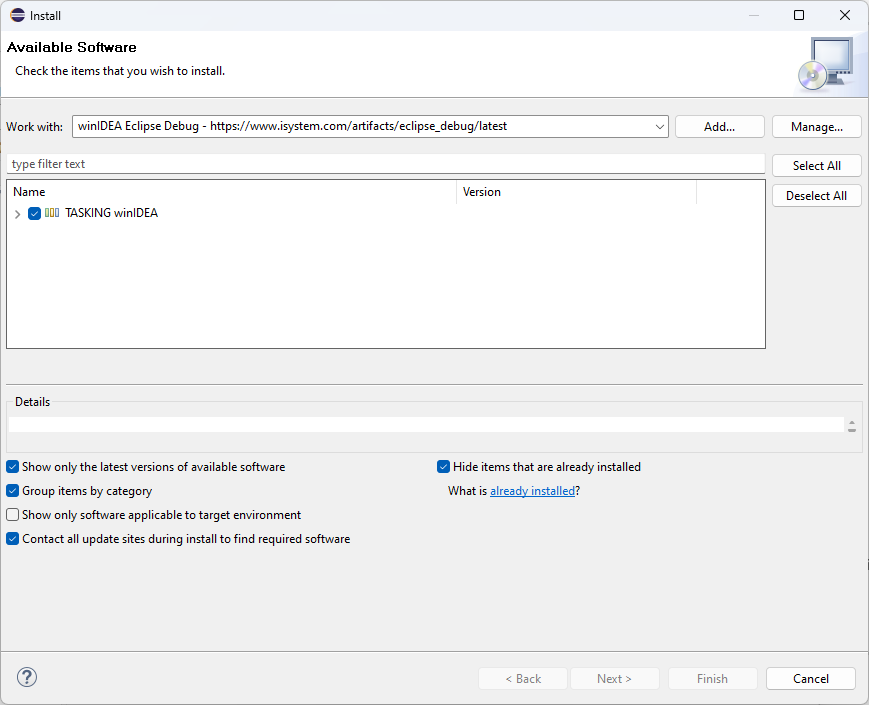
1. Launch Eclipse and go to Help > Install New Software.
2. In the Work with text field enter https://m1.247365bb.com/ftp/afrs/production/eclipse_debug_generic/latest and follow the installation wizard.
If there is an available update for the plugin, you can update it via Help > Check for Updates.
3. Install (or update) winIDEA in Window > Preferences > TASKING winIDEA.
•Use embedded installation - If winIDEA is not already installed on your PC, click Install. If there is a new version of winIDEA available on the web a message is displayed on top. Click the Update button to update winIDEA to the latest available version.
•Use this installation - If a standalone winIDEA is already installed on your PC, the existing installation will be detected, and you can select it to be used in Eclipse.

4. Create a new Eclipse project.
Refer to the Eclipse/CDT help documentation for detailed instructions on creating a project, writing code, and compiling it. Ensure you know the name and location of the output file that should be downloaded to the target.
5. Create a Debug Configuration in Debug > Debug Configuration > TASKING winIDEA tab.
•Device
•Hardware
•Communication type
•etc.
winIDEA IDE is launched in the background.
6. Start debugging.
More resources
•Debug configuration settings - Additional configuration