Debug configuration settings
In this topic:
•Advanced configuration options
Before running a debugger from Eclipse, create a debug launch configuration.
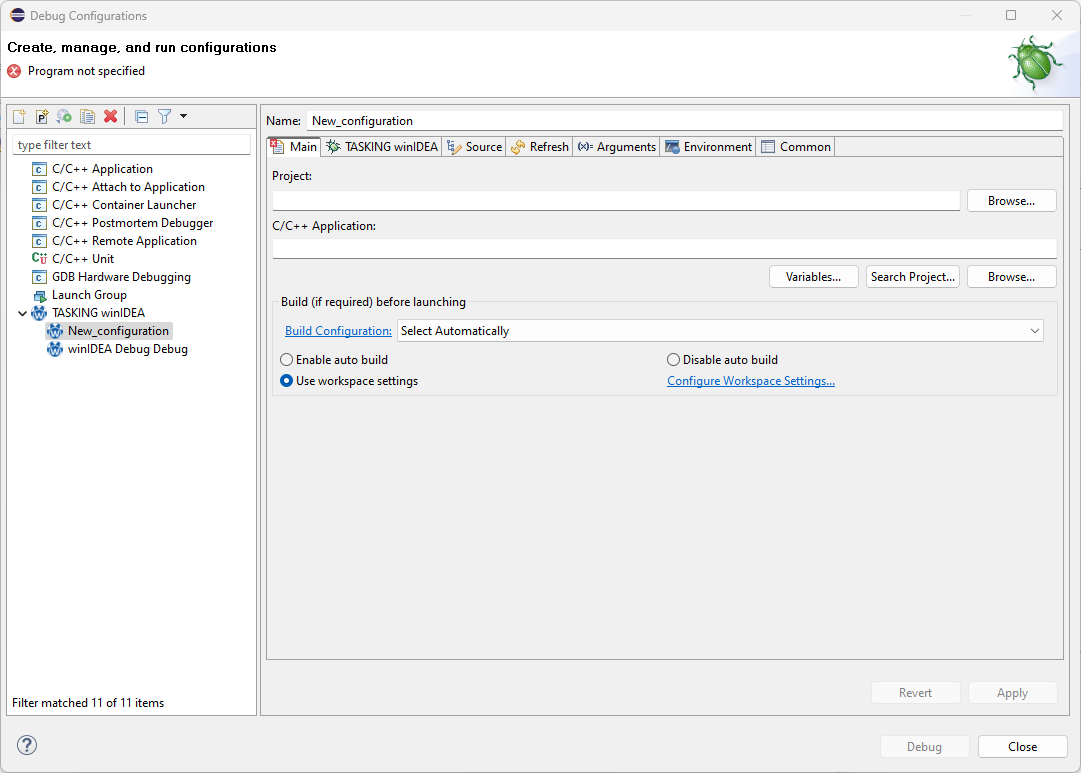
Main tab
Name - Configuration name, which is shown in the list of configurations on the left.
Project - The project, to which the configuration belongs to.
C/C++ Application - The output file, which will be downloaded to the target.
Debugger tab
Stop on start up at - Defines if the execution should stop after start up, and where it should stop.
Verify after download - Specifies whether to perform a verification of the file downloaded to the target system.
Analyze source files - When checked, source files will be analyzed after download.
Show winIDEA - You can hide/show winIDEA. You can also bring it to the top.
Close winIDEA after debug session termination - When checked, winIDEA will be closed after debug session termination. You can also check if you want to save the winIDEA workspace at shutdown.
Verbose log output - If checked, a detailed log of debugger execution is stored into a log file. Since it takes some space and time, you should usually leave this unchecked. If you have any issues, you can check this option and send the log file to the Support team.
Workspace file - Path to the workspace file that will be opened by winIDEA. Its extension must be either 'xjrf' or ‘xqrf’. The path can be absolute or relative, if relative then is relative to the selected project. You can choose an existing winIDEA workspace (recommended). If a workspace file does not exist, a new one will be automatically created. In this case, the Workspace creation section must be filled in with all the information.
•Browse - Select an existing winIDEA workspace file. This allows you to choose a pre-existing workspace.
•Configure - Opens the advanced winIDEA configuration settings.
•Clear workspace - Clears the current workspace settings and allows you to redefine a workspace configuration from scratch.
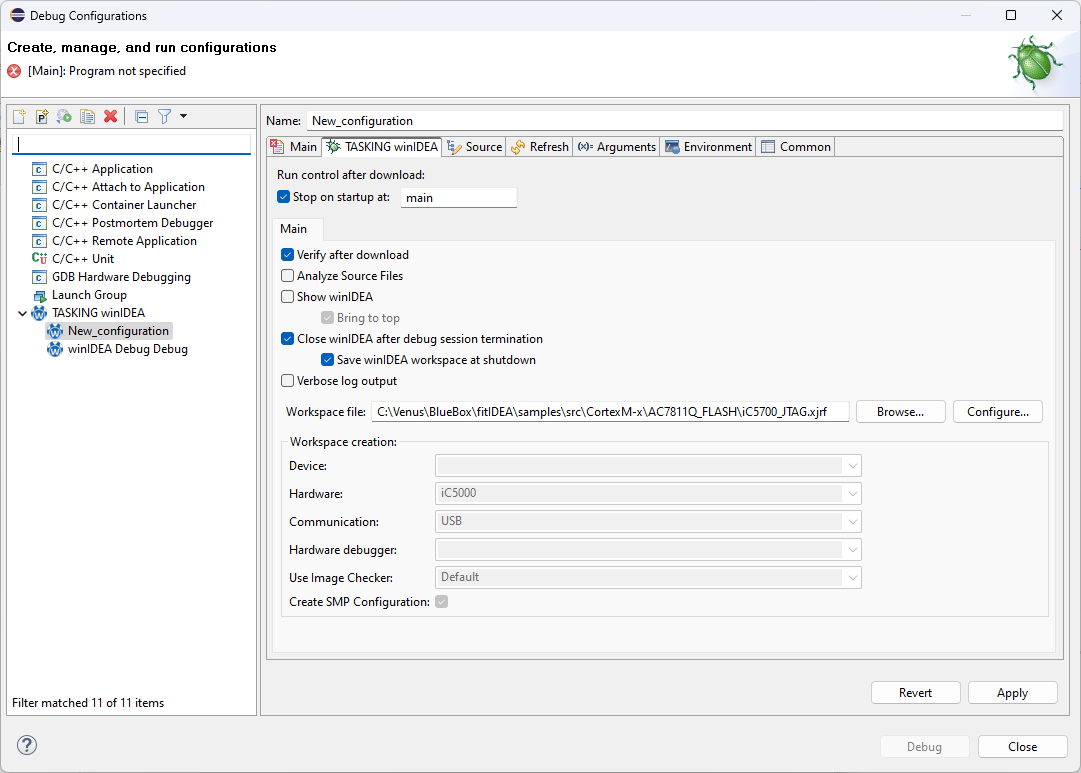
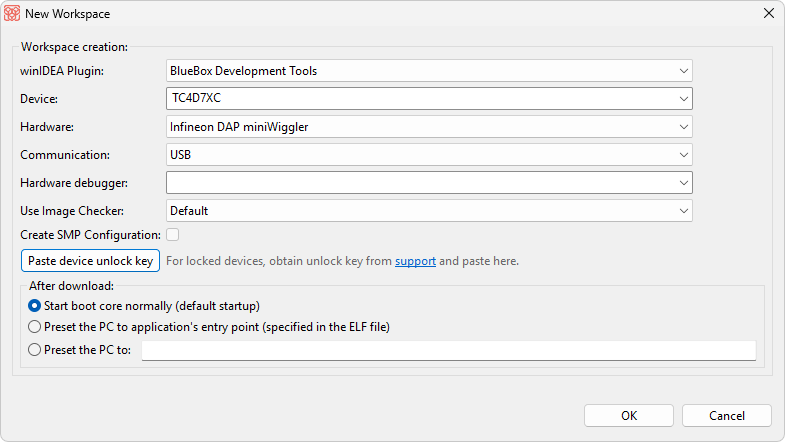
Workspace creation
This section is active when the selected workspace does not exist. It allows the user to create a new winIDEA workspace by selecting the device, hardware, communication type, and other related settings. If the workspace already exists, this section is grayed out.
Device - Select the used SoC.
Hardware - Choose which BlueBox are you using (or other hardware).
Communication - Select the communication type with the selected hardware (options: USB, Ethernet).
Hardware debugger - Select the specific debugger hardware you are using.
Use Image Checker - You can select the use of image checker, which analyzes the download file(s) at download to prevent misconfiguration of MCU, which could result in incorrect boot or bricked MCU.
Create SMP Configuration - If checked winIDEA will create SMP configuration on all cores (excluding Security cores).
Paste device unlock key - If the MCU requires a security unlock key, you can paste the unlock key (provided by support) to access the device and its locked features.
After download - Select an option:
•Start boot core normally (default startup) - Execution starts from its boot core in its normal startup configuration.
•Preset the PC to application’s entry point (specified in the ELF file) - Presets the Program Counter (PC) to the entry point of the application as specified in the ELF file.
•Preset the PC to - Manually specify a custom address to preset the PC
Advanced configuration options
This option uses the workspace specified in the TASKING Debugger | Workspace file field. If the workspace does not already exist, a new one will be created before accessing the advanced configuration options.
