Configure AMP
This tutorial guides you through the basics steps of configuring a AMP if one Program/Symbol File is used.

Configuration steps
|
Configure a New Workspace via File | Select Workspace | Create New Workspace. |

|
Add the second Application via Debug | Configure Session | Switch to Full | Add. |

|
Configure the second Application. |

•Name
•Operating System (OS)
•Symbol Files
•etc.
|
Open SoCs via Edit button. |
|
Define Memory Space. |
Make sure the correct Application is selected in the Application drop-down.
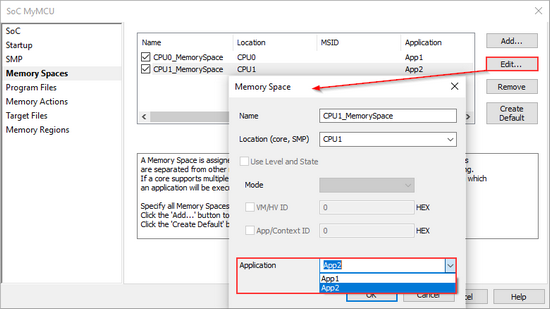
|
Perform Reset / Download. |

Begin a Debug session via:
•Download (this step will also Program the SoC)
•Load Symbols Only
•Reset
•Attach
|
Open the secondary winIDEA instance via: |

•Double-clicking the specific core in the Session Explorer
•Selecting Debug | Core | <core>
|
Connect to the primary winIDEA instance via Debug | Connect. |

More resources
•Troubleshooting - Knowledge Base