Multi-core debugging
This chapter explains NXP/ST Power Architecture multi-core debugging and debug functionalities. For general debug information refer to Multi-core debugging.
Debugging multi-core application
When the microcontroller is released from the reset state, the main core first executes code from the Boot Assistant Module (BAM), which initializes certain modules (e.g., MMU), then reads reset configuration and starts the user code.
Typically, all other non-primary cores are started by the primary core application code. On certain MCUs (NXP MPC57xx or ST SPC57), other cores can also be started directly by the Boot Assistant Module already, which means they can start running at the same time (out of reset) when the main core starts executing the code.
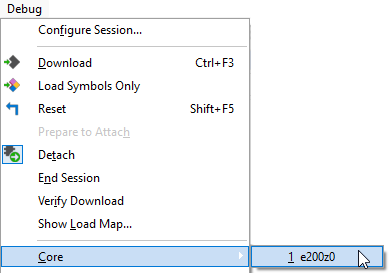
The second core is debugged more or less in the same way as a primary core. The second core winIDEA instance provides all standard debug windows such as Disassembly Window, Memory Window, Watch Window, Locals Window, Source window, Trace window, etc.
The application code for the second (and any further) core is loaded by the primary winIDEA instance/workspace, which programs the application code in the SoC internal program flash. Program flash is shared amongst all cores available. The second (and any further) core winIDEA instance requires to program only symbols for the specific core being debugged. Don’t forget to specify the necessary program file including debug symbols in each non-primary core winIDEA instance.
Typically, when the microcontroller is released from the reset state, the main core first executes code from the Boot Assistant Module (BAM), which initializes certain modules (e.g. MMU), then reads reset configuration and starts the user code.
Typically, all other non-primary cores are started by the primary core application code. On certain SoCs (NXP MPC57xx or ST SPC57), other cores can also be started directly by the Boot Assistant Module already, which means they can start running at the same time (out of reset) when main core starts executing the code.
Execution Breakpoints
The debugger programs the application code in the program flash and stops at the program start point. At this point in time, all other cores are still in the reset state. The state could be different if the Boot Assistant Module (where applicable) would start the other non-primary cores directly.
Now, if the user sets execution breakpoint(s) on any non-primary core, these are not applied to the specific core yet since the core is still in reset state and the debugger has no control over its operation yet. For the same reason, on-chip breakpoint logic is not operational yet either. In this stage, the debugger periodically (few times per second) checks the debug status (reset, run, stop, etc.) of each core. As soon as the debugger detects that the non-primary core is being released from the reset state (which happens when main application is being run), it configures the on-chip debug logic and applies the execution breakpoints. This results in a certain delay between the moments when the core exits reset and when the execution breakpoints start acting. Consequentially, certain code on this core is being executed already before the execution breakpoints start acting. Clearly, any execution breakpoint set in this part of code being executed from reset on only will not hit.
Software execution breakpoints are not available on non-primary cores since setting and clearing a software breakpoint means reprogramming (erase-program) the program flash. Any non-primary core could in the meantime, while software execution breakpoint is being applied, try to execute the code from the same flash sector, which would result in the application malfunction.
Debugger still provides software execution breakpoints for the primary (main) core. They can be used when debugging a single core application (either on a single or a multi-core microcontroller). However, as soon as the application runs on multiple cores, software execution breakpoints should not be used to prevent problems mentioned in the previous paragraph.
eTPU Debug
The Enhanced Timing Processor Unit (eTPU) has its own Nexus class 3 interface, the Nexus Dual eTPU Development Interface (NDEDI). The Nexus Dual eTPU Development Interface provides real-time development capabilities for the eTPU system including two engines and the coherent dual parameter controller (CDC) in compliance with the IEEE-ISTO 5001-2002 standard. The main development features supported are hardware execution breakpoints, register and memory access, instruction and source step, run/stop control, branch (program) trace, data trace, and ownership trace. Combined, these features make the interface for each engine compliant with Class 3 of the IEEE-ISTO 5001-2002 standard.
In order to debug the eTPU1 or the eTPU2, open desired core from the Debug > Core menu. Refer to chapter Multi-Core Debugging for more information
SPT Debug
Open SPT winIDEA instance by selecting Debug > Core > SPT.
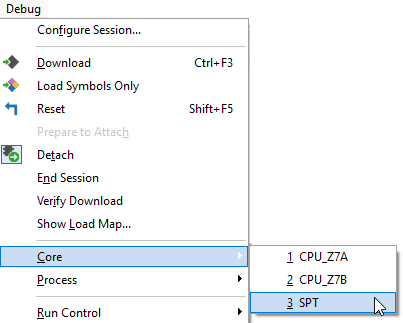
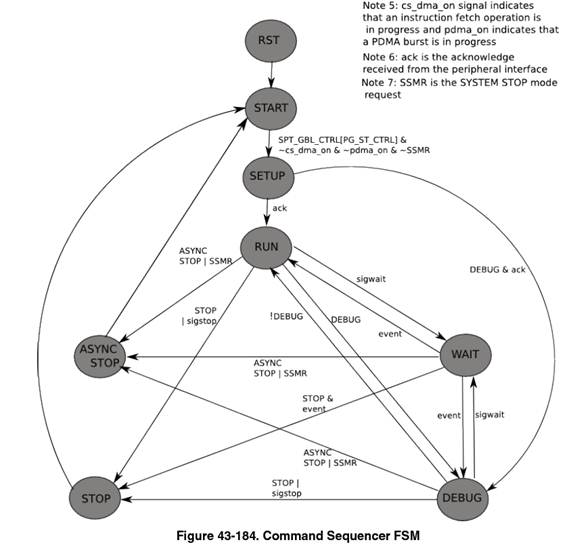
SPT is different than a typical core handled by winIDEA, therefore the debug experience differs as well. SPT may be in any of the following states. Status display in winIDEA for this core will reflect these states instead of typical statuses (stop, run, halted, reset) in order to provide more clarity to the user.
One of the major differences is the STOP state. On other cores, this status means that the execution of the user's code is stopped and the core is ready for debug. On SPT, however, this means that a STOP command was used and debugging is not possible. Instead, there is a DEBUG state, which means that the CPU has stopped executing user's code and is ready for debug.
SPT has 4 breakpoints, but they work as post-execution breakpoints.
Note that **Run** command typically puts the SPT in RUN state, but if there are any breakpoints set, then the SPT will step until the next breakpoint (enter RUN state and then immediately enter DEBUG state). This is done automatically by SPT.
SPT Instruction Jamming
Instructions may be directly filled to the command sequencer. This can be done through winIDEA SDK. Following is a python example for SPT instruction jamming:
import isystem.connect as ic
cmgr = ic.ConnectionMgr()
cmgr.connectMRU('')
ideCtrl = ic.CIDEController(cmgr)
print(ideCtrl.serviceCall('/IOPEN/HW.Debug.InstructionStuff', 'InstrHex: 04000000000000000000123456789abc'))
#set.immed 0x123456789ABC, WR_0
ideCtrl.refreshUI()