How to program FPGA bitstream
In this topic:
Introduction
Programming an Field Programmable Gate Arrays (FPGA) is the process of loading a bitstream into the FPGA. During the development phase, the FPGA device is typically programmed using dedicated software utilities and hardware from the FPGA manufacturer, connecting the PC through a USB port to the FPGA to be programmed via the FPGA JTAG port.
The FPGA AMD Ultrascale+ series features embedded Arm processors. When the BlueBox is used to develop and test the embedded application for these processors, it can at the same time be used to load a bitstream into this same FPGA. This comfort feature shortens the turn-around times simply by using one tool for several use cases.
The BlueBox with winIDEA programs a bitstream to the FPGA in the same manner as embedded on-chip flash devices or external SPI flashes are programmed. When the specific Zynq Ultrascale+ device is selected for debugging, an FPGA device, where the bitstream is to be programmed, becomes listed where typically, e.g. on-chip flash to be programmed is listed. The bitstream can be programmed on request or as a part of the debug download process.
Requirements
•Selected Device in Debug | Configure Session,
•winIDEA Workspace configured
•Established Debug Session
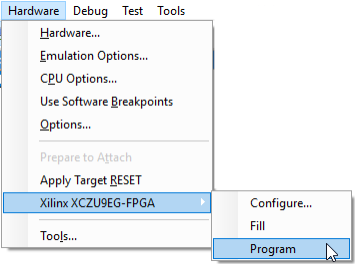
All internal storage devices will be listed in Hardware drop-down menu including FPGA matrix. The manipulation of FPGA matrix needs to be enabled first.
Configuration steps
|
Enable bitstream via Hardware | Options | Programming. |

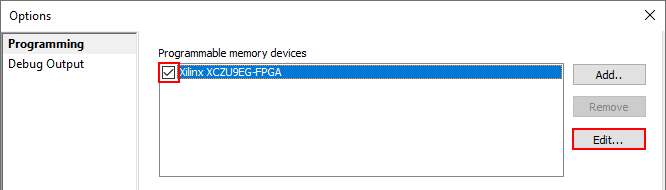
|
Configure available options via Edit button. |

|
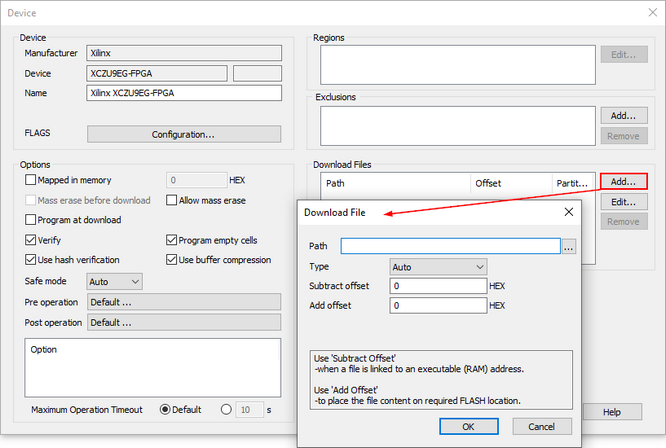
Add files you want to program in Download files. |

|
(optional) Disable ByteSwap under FLAGS Configuration. |


|
Establish the Debug Session. |

|
Execute the operation via Hardware | <device> | <operation>. |