Initialization sequence
In this topic:
Introduction
An embedded application must itself properly initialize the CPU and surrounding components to be able to run correctly. There are however situations during development and production when it is beneficial to condition the system before the application runs.
These are some typical situations:
•Configuration of chip-select logic to allow download into memory devices not accessible after CPU is reset
•Configuration of system clock to allow faster JTAG clock operation, download, etc
•Disabling of watchdog timers
You can condition the system on the following points:
•Initialization before Programming, Debug Session, at Attach (Hardware | CPU Options | Reset)
•SoC Initialization (Hardware | CPU Options | Analyzer)
|
Initialization is only used with debugger attached. When the target is running standalone, the initialization is not performed and the target can behave differently. |


Debug Session showing where you can insert initialization scripts (extension points)
Default Configuration
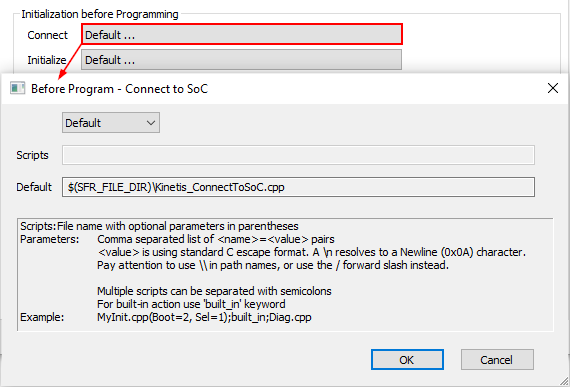
Default action is visible by clicking the Default button which opens a dialog:
•Before Program - Connect to SoC
•Before Debug - Connect to SoC
where default initialization script is visible.
Infineon TriCore, NXP/ST Power Architecture, Renesas RH850: Do not have default initialization sequence, therefore the Default setting means disabled.
Arm Cortex: Some Cortex devices have (EVE) initialization file configured in the JSON file, which is visible in the device root SFR file.
|
Default settings are designed to work for the most cases. If they don't work for your case, follow the advice from Technical support. |
Custom Configuration
For more information, refer to how-to guide Add a custom initialization script.