TriBoard TC3X9
This topic describes detailed SoC settings for the following hardware:
•Target:
oTriBoard TC3X9 TH V2.0(1)
oTriBoard TC3X9 V2.0
•Supported SoCs:
oTC387QP, TC387TP,
oTC389QP
oTC397QP, TC397X, TC397XE, TC397XE step Ax, TC397XL step Ax, TC397XM, TC397XP, TC397XX, TC397XZ
oTC399X, TC399XE, TC399XE step Ax, TC399XP, TC399XX
•Board User's Manual: AURIX™ TC3xx TriBoards
For more information regarding SoC or board, refer to MyICP.
General Configuration
1. Create a New Workspace via File > Workspace > New Workspace and follow the wizard.
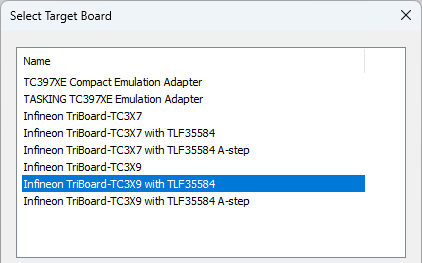
2. Select your Target Board.
Once your workspace is created, you can recall this dialog by clicking Hardware > Select target.

Example dialog
Additional TLF38854 configuration
Extra configuration is required to be able to debug with step A and subsequent step devices.
1. Make sure the correct preset with the TLF38854 version is selected.
2. Turn off the Target Board power.
3. Turn on the debugger.
4. Reset the application.
You should see SoC status SoC NO POWER in the lower right corner of winIDEA.
5. Turn on the Target Board power.
You should see SoC status STOP in the lower right corner of winIDEA.
|
The TM signal is pulled low to GND with resistor R509 = 0R, however with schematic revision V1.02 and continuing through versions V2.xx) the TM signal is pulled high through R508 beginning. |
|
If your Target Board is not supported in winIDEA, contact Technical support. |