Connecting winIDEA to Synopsys VDK Virtual ECU
In this topic:
Introduction
winIDEA can connect to a Synopsys VDK Virtual ECU (vECU) and provides the same debugging and scripting experience as on real hardware. This guide walks you through the setup and configuration steps to get started.
Requirements
•Synopsys VDK tools and license
•Latest winIDEA version, to ensure compatibility with the latest VDKs
Configuration steps
1. Configure the simulation.

Example configuration
2. Open File > New > New Workspace and select MCD interface simulator as the Debugger.
3. Configure Basic Session Configuration:
a.Select the VDK you are using in the Device field.
b.Specify the Symbol file for your application.
c.Choose No Program file, as this was already specified in the Virtualizer Studio.
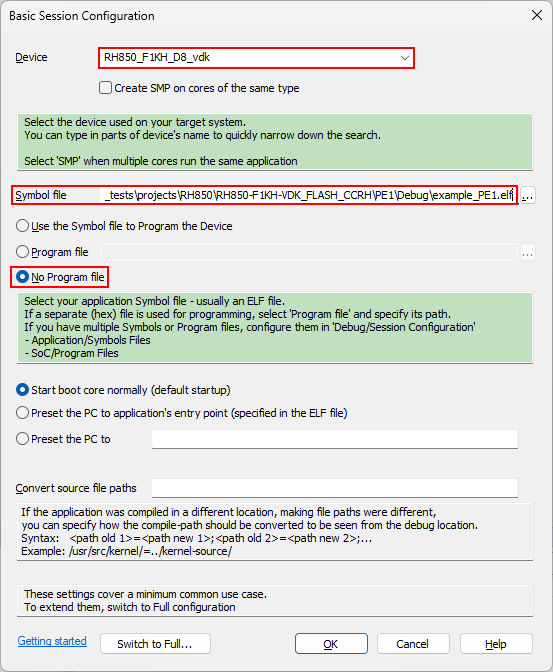
For a more complex application, click on Switch to Full and perform a Full session configuration.
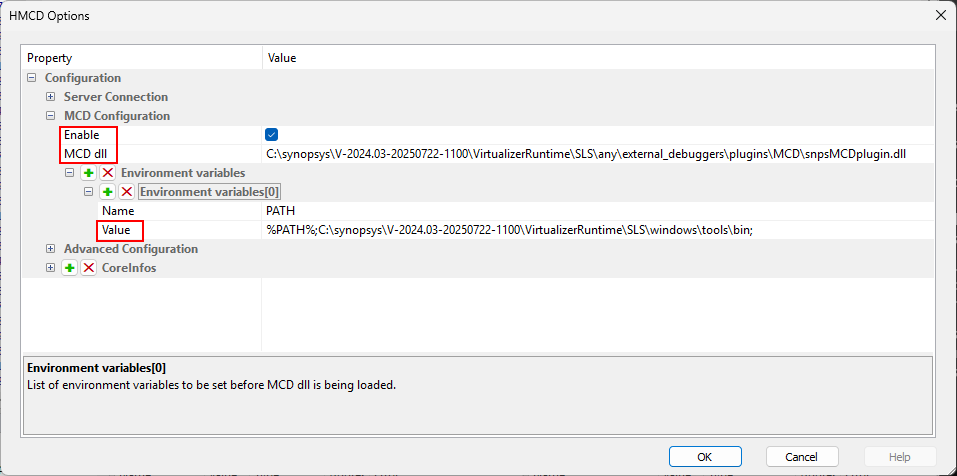
4. Configure MCD.
a.Select Synopsys Simulator.
b.Enable MCD.
c.Specify the path to the MCD dll. The exact dll location might vary between Virtualizer Studio versions.
d.Extend the PATH variable with the path to Virtualizer Studio tools. The exact location might vary between Virtualizer Studio versions.
Select File > Workspace > Save Workspace to save the winIDEA workspace.
5. Start debugging.
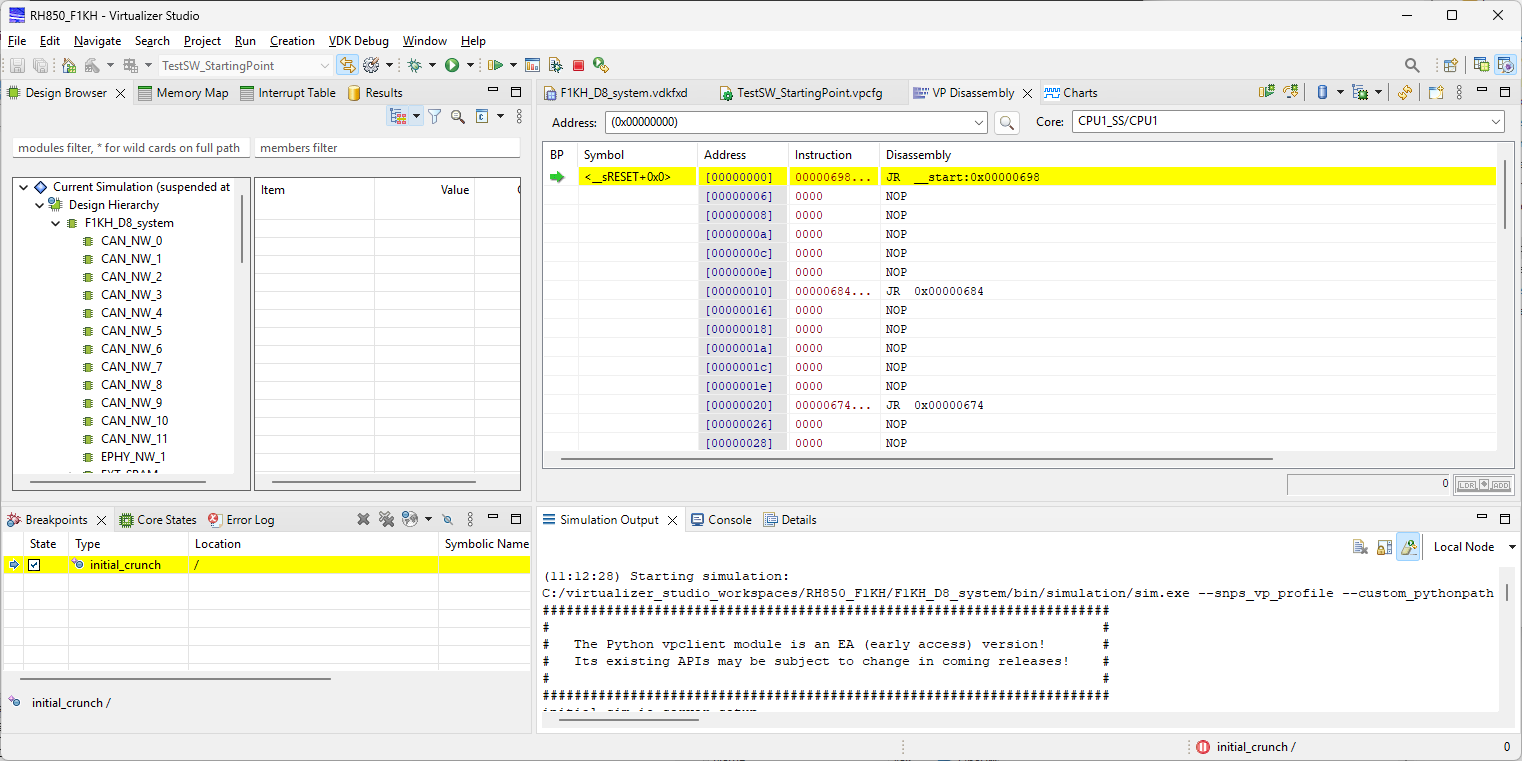
a.Start the simulation in the Virtualizer Studio and wait until it reaches initial_cruch.
b.Attach with winIDEA using Debug > Attach.
c.Resume suspended simulation in Virtualizer Studio
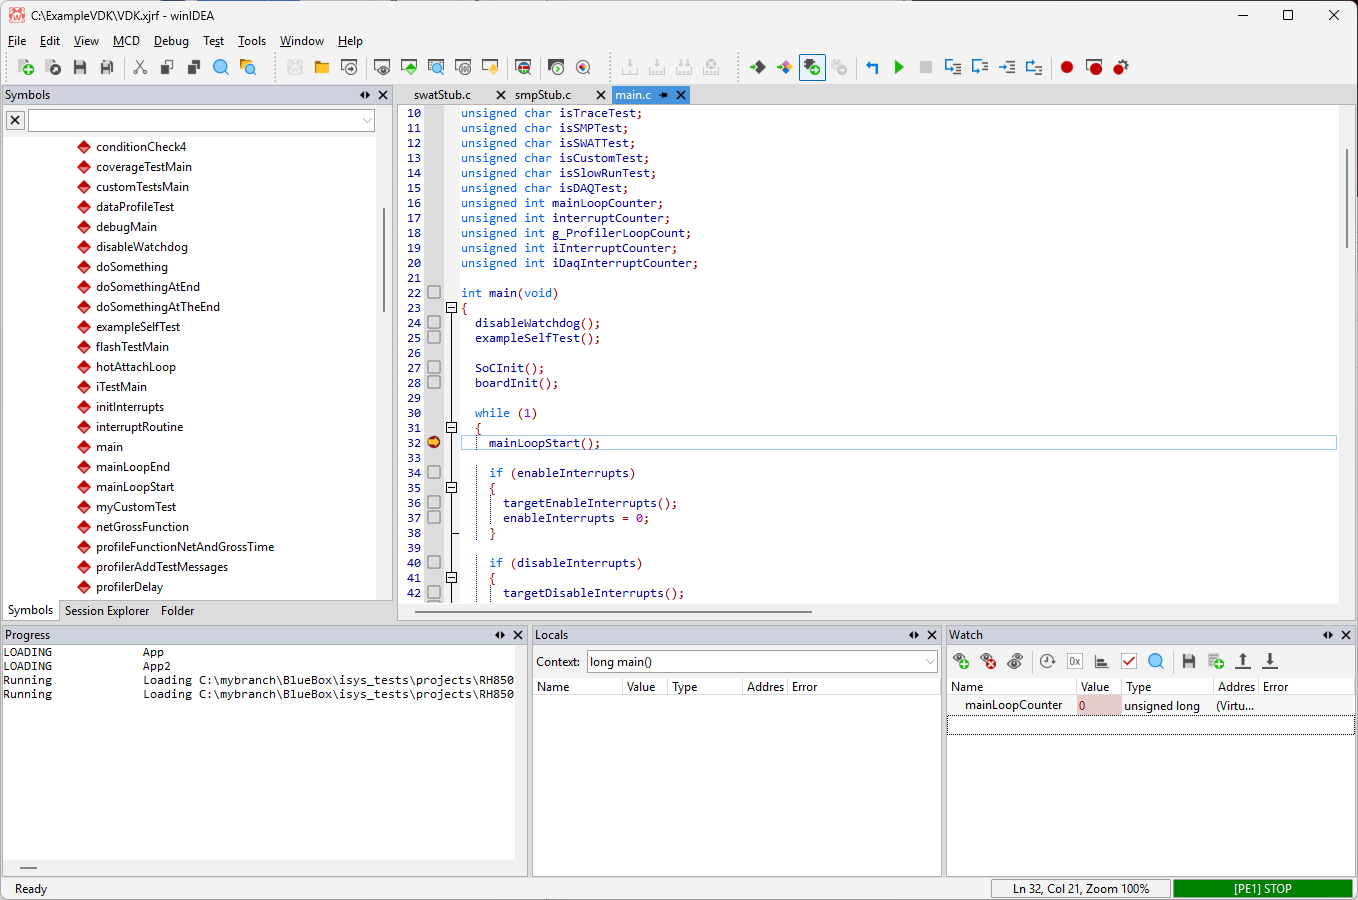
You now have the control of the simulated SoC:
More resources
•winIDEA SDK - User's Guide
•Virtual ECUs - Landing page