Connecting winIDEA to VLAB3 Virtual ECU
In this topic:
•Configure the winIDEA Workspace
Introduction
winIDEA can connect to a VLAB VDM Virtual ECU (vECU) and offer the same debugging and scripting experience as you are used to on real hardware.
Requirements
•VLAB3
•VLAB license
•winIDEA version 9.21.382 or newer
Start the simulation
Prepare and run a Python script that will launch the simulation.
Script example for a TC39xB device:
import vlab |
Configure the winIDEA Workspace
You are now ready to switch to winIDEA and start working with the virtual ECU.
1. Create a new Workspace and select MCD interface simulator as Debugger.
2. Specify the VDM you are using and select the application you wish to debug.
a.Make sure to preset the PC to the application’s entry point.
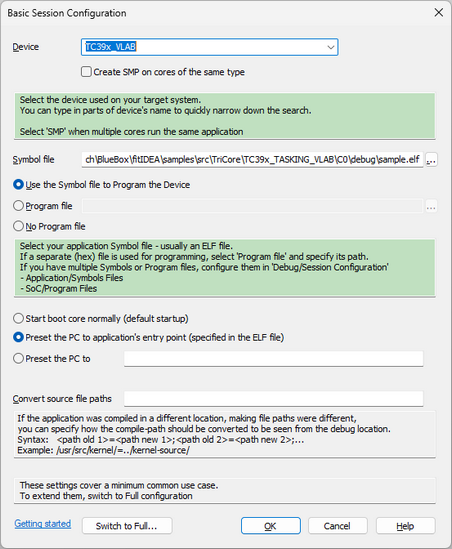
The workspace is now created.
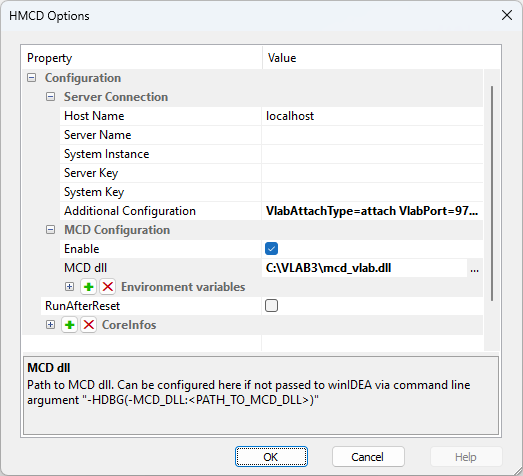
3. Open MCD > Options and configure:
a.Simulator: VLAB3
b.Server Connection:
i.Host Name - Either specify localhost or the IP / server name where the simulation is running.
ii.Specify Additional Configuration settings (the port number should match the one you configured in the Python script): VlabAttachType=attach VlabPort=9701
c.MCD Configuration:
i.Enable MCD connection.
ii.Specify the path to the MCD dll based on your local installation.
4. Save your winIDEA Workspace in File > Workspace > Save Workspace.
5. Begin a debug session by selecting Debug > Download.
You can now start debugging your application in the same way as you would on real hardware.
More resources