Connecting winIDEA to VLAB2 Virtual ECU
In this topic:
•Configure the winIDEA Workspace
Introduction
winIDEA can connect to a VLAB VDM Virtual ECU (vECU) and offer the same debugging and scripting experience as you are used to on real hardware.
Requirements
•VLAB2
•VLAB VDM
•VLAB licence
•winIDEA version 9.21.307 or newer
Start the simulation
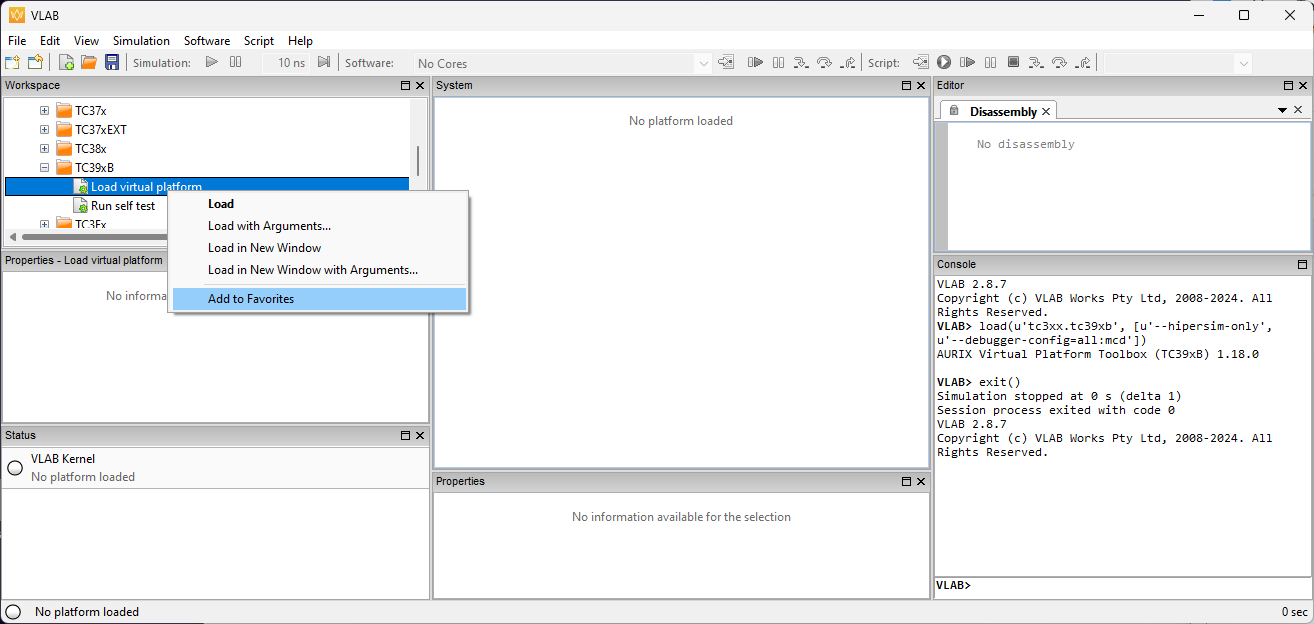
1. Open VLAB and find the platform you would like to use. Add it to Favorites.
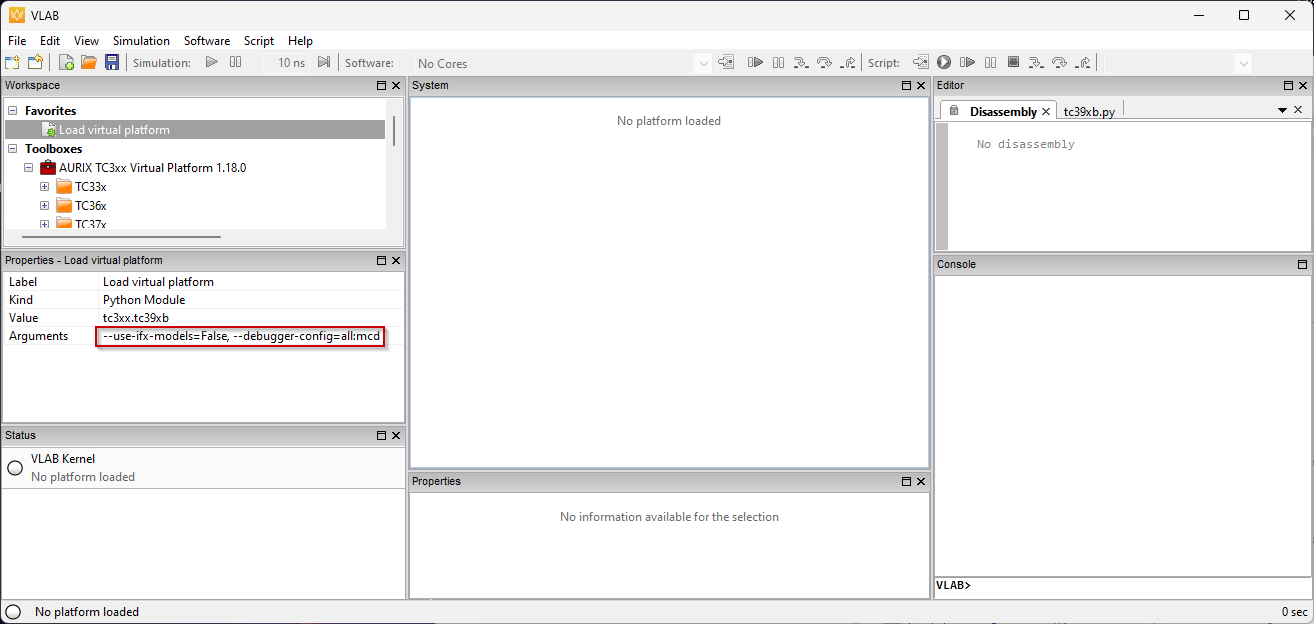
2. Select your platform among the Favorites and edit the arguments. Add:
--use-ifx-models=False, --debugger-config=all:mcd
3. Right-click on the platform and select Load.

4. Open View > Status and run the VLAB Kernel.
You can also achieve the same with a script. For the given example you can call:
vlab.load("tc3xx.tc39xb", args = ["--use-ifx-models=False", "--debugger-config=all:mcd"])
vlab.run()
Configure the winIDEA Workspace
You are now ready to switch to winIDEA and start working with the virtual ECU.
Step 1: Create new winIDEA workspace
Open winIDEA and select Create New Workspace...
Dialog New Workspace opens.
Step 2: Set new workspace
In the New Workspace dialog define:
a.Name
b.Location
c.Select MCD interface simulator as Debugger and confirm.
Dialog Basic Session Configuration opens.
Step 3: Set basic session configuration options
1. Specify the VDM you are using in the Device field.
2. Select the application you wish to debug.
3. Select option PC to the application’s entry point.
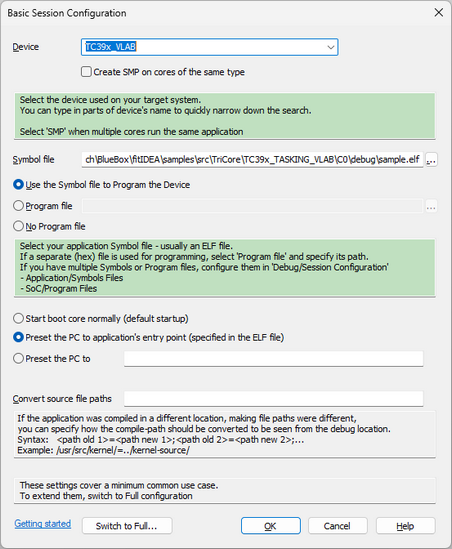
Workspace is now created.
For a more complex application, click on Switch to Full and perform a Full session configuration.
Step 4: Configure MCD options
Open MCD > Options and select a suitable Simulator.
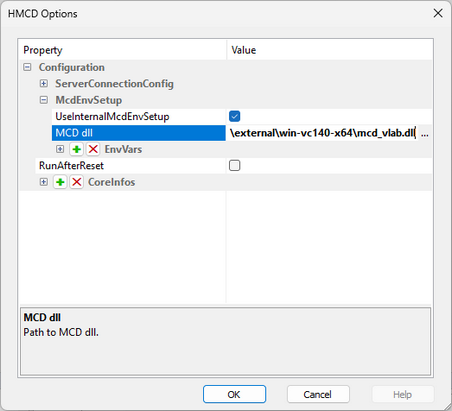
Step 5: Program the application
1. Save your winIDEA Workspace via File > Workspace > Save Workspace.
2. Begin a debug session by selecting Debug > Program.
You can now start debugging your application in the same way as you would on real hardware.
More resources