Infineon DAP miniWiggler for Infineon AURIX
In this topic:
•Create and configure a winIDEA workspace
•Debug with miniWiggler TAS over TCP/IP
Introduction
The Infineon DAP miniWiggler Debugger is available as an on-board debugger on Infineon starter kits for AURIX™ TC2xx and TC3xx multi-core microcontrollers, and as the standalone Infineon miniWiggler USB.
The miniWiggler is supported in the following environments:
•winIDEA - license required (if no license is provided, miniWiggler may be used for evaluation and non-commercial use only)
•Infineon's AURIX™ Development Studio (ADS) - for non-commercial use, no license required
Once you have got your application beyond the trial stage, upgrade to a winIDEA/BlueBox combination to make use of program and data trace for your AUTOSAR automotive applications.
Infineon DAP miniWiggler can be used directly within winIDEA to allow direct programming and debug control of AURIX devices.It provides a simple connection to the target via USB and enables basic debugging and flash programming.
|
The DAP miniWiggler is free to use only with AURIX™ Development Studio (ADS). When used with winIDEA, a valid winIDEA license is required. |
For more information, visit https://www.infineon.com/cms/en/product/promopages/das/.
Supported devices
The following AURIX™ device families are supported:
•AURIX™ TC2xx
•AURIX™ TC3xx
•AURIX™ TC4x
Features
•DAP debug interface support
•Basic debug control (run, stop, reset, breakpoints)
•Flash programming
Getting started on Windows
1. Download and install the Infineon DAS Tool Interface for Windows.
2. Connect to the Infineon DAP miniWiggler.
The Infineon DAP miniWiggler is connected via USB to the host PC running winIDEA development and test environment.
Getting started on Linux
1. Download and extract the Infineon DAS Tool Interface for Linux.
2. Install drivers for the FTDI chip used by miniWiggler.
See Application Note for more information.
3. Before starting a session in winIDEA, run the TAS server:
sudo TAS_V1_1_0/bin/tas_server |
Create and configure a winIDEA workspace
The following steps are valid for Windows or Linux operating systems.
1. Create a new workspace or select an Example Workspace.
2. Verify that Infineon DAP miniWiggler is selected in Hardware | Debugger Hardware | Hardware Type.
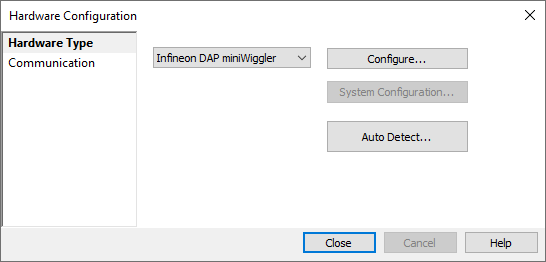
3. (optional) Open Configure to adjust connection details:
•Select which server/board winIDEA should connect to when several are detected.
•Provide a session name, or leave it blank to use the system default.
Debug with miniWiggler TAS over TCP/IP
The following steps are required to set up and use the Infineon DAS miniWiggler for network-based debugging with winIDEA. The process involves configuring both the host PC (where the target is connected) and the client PC (running the winIDEA IDE).
By the end of this setup, you will be able to initiate and manage remote debug sessions over TCP/IP using the Infineon DAP miniWiggler.
Requirements
•winIDEA version 9.21.329 or newer
•Infineon DAS and TAS server installed on the host PC
•Network access to host PC (TCP port 24817 open)
Configuration steps
1. Configure host PC.
a.Connect the Target to the PC using DAS miniWiggler.
b.Install Infineon DAS.
c.Start the TAS server on Windows:
DAS64\servers\start_tas_server.bat |
2. Configure client PC via winIDEA and open Hardware | Debugger Hardware.
a.Hardware type - Infineon DAP miniWiggler
b.Communication - TCP/IP
i.IP addr - IP address of the host PC
ii.Port - 24817
c.Begin a debug session.
More resources
•Install winIDEA IDE for Windows
•Install winIDEA IDE for Linux