Connecting winIDEA to Corellium AVH Virtual ECU
In this topic:
•Configure the winIDEA Workspace
Introduction
Corellium Arm Virtual Hardware (AVH) is a cloud-based virtualization platform that provides virtual platform of Arm hardware, allowing developers to run, test, and debug embedded software without needing physical devices.
winIDEA can connect to a Corellium AVH Virtual ECU (vECU), and offer the same debugging and scripting experience as you are used to on real hardware. This guide walks you through the setup and configuration steps to get started.
Requirements
•Corellium AVH account
•winIDEA version 9.21.327 or newer
Create a new device
Follow these steps in Corellium AVH.
1. Create device.
a.Select Default Project.
b.Add the device.
2. Configure your device by uploading the ELF file in the Upload your own firmware section.
3. Give it a meaningful name and confirm details by clicking Create device.
4. (optional) Set advanced boot options.
For example, replacing the UTEST and FLASH memory partitions.
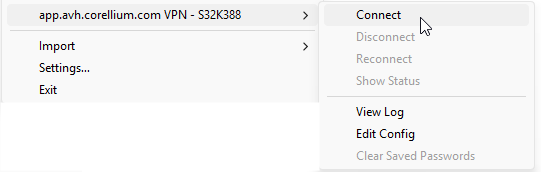
Connect to VPN
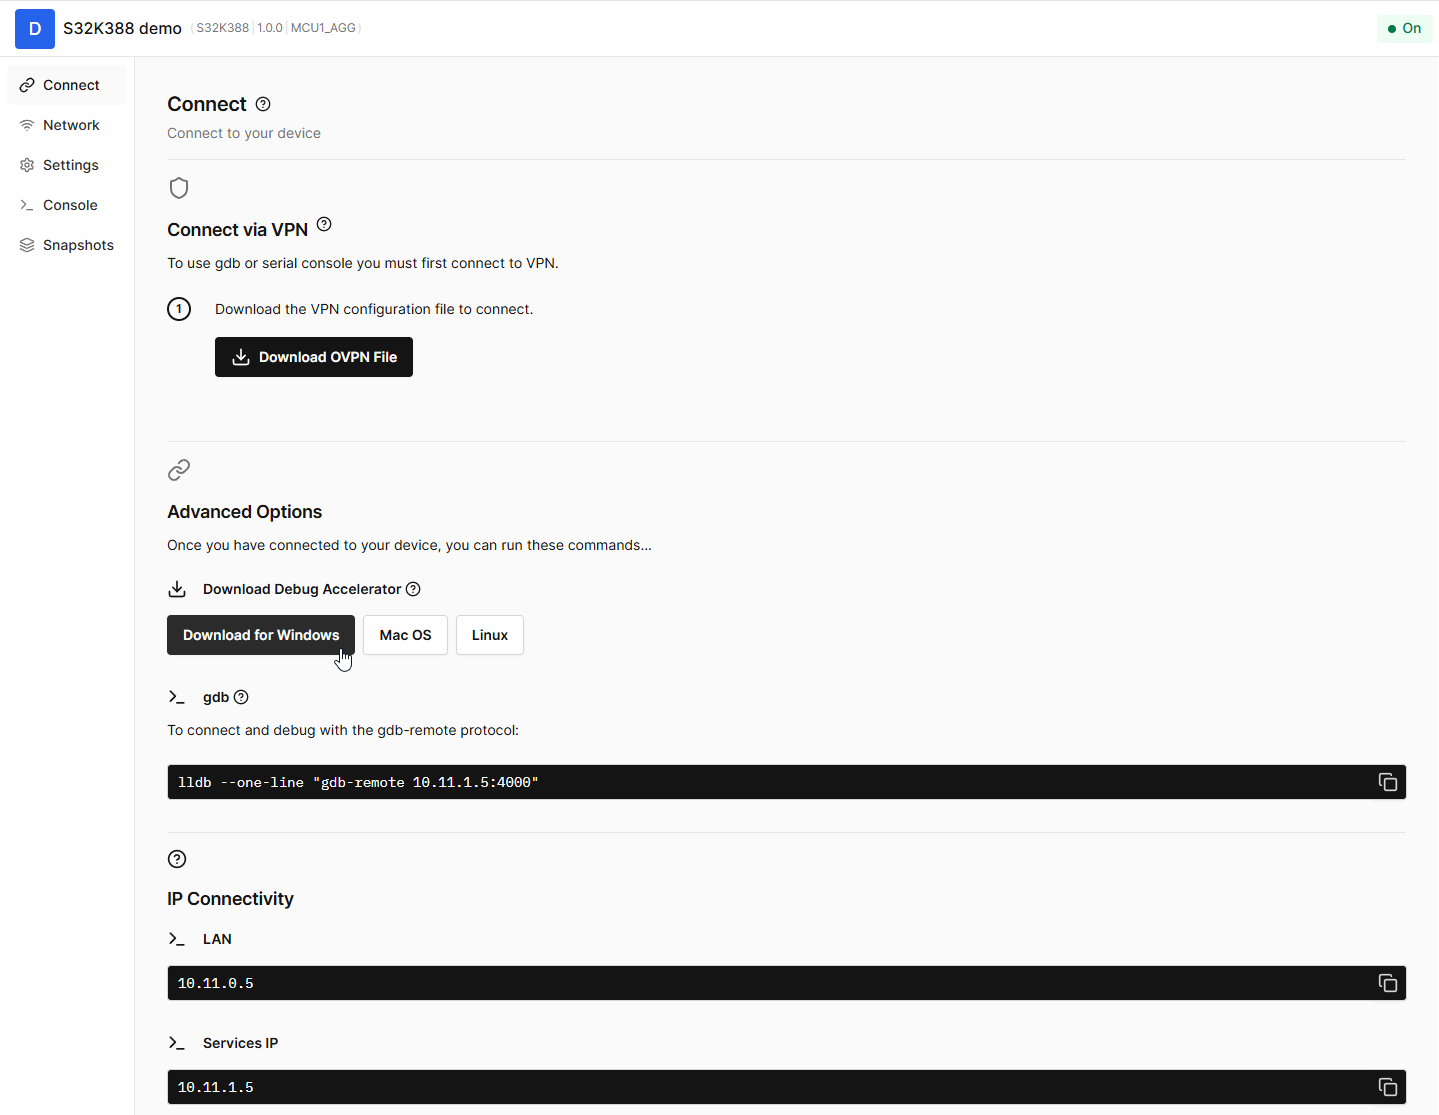
1. Open the Connect page and download the OVPN file.
2. Open the OpenVPN program and import the OVPN file you just downloaded.

3. Connect to the VPN.
Enable Debug Accelerator
Debug Accelerator will significantly improve the responsiveness of your debugging experience.
1. On the Connect page under Advanced Options, download Debug Accelerator.
2. Run the installer and start the application.
3. Enter the Remote IP as specified in the gdb connection snippet shown on the Connect page.
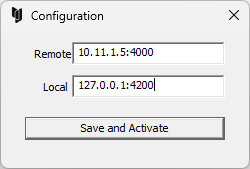
4. Click Save and Activate.
Configure the winIDEA Workspace
You are now ready to switch to winIDEA and start working with the virtual ECU.
1. Create a new Workspace in File > New > New Workspace and select GDB Client as Debugger.
2. Select AArch32 as Device and specify the Symbol file of the application you wish to debug.
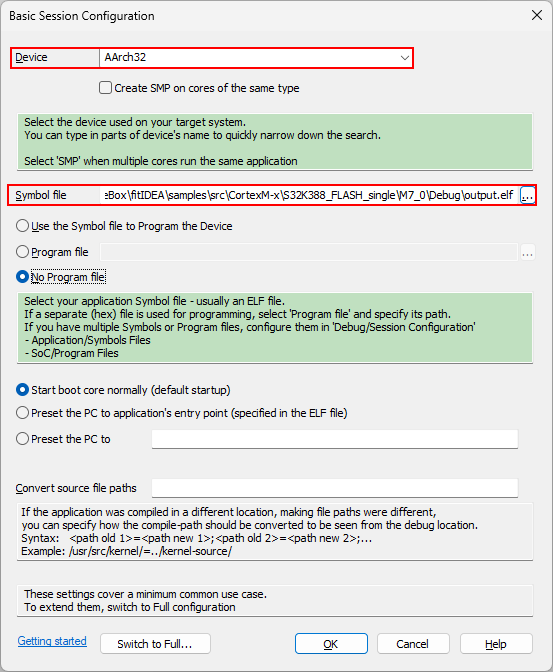
The workspace is now created.
3. Open GDB > Options and set up:
a.Debug Location - Local.
b.Enable GDB connects to gdbserver.
c.Click Configure.
4. Configure the GDB parameters:
•IP address
•Port specified in Debug Accelerator.
5. Establish a GDB connection to Corellium AVH via Debug > Attach.
You can now start debugging your application in the same way as you would on real hardware.
More resources
•winIDEA SDK - User's Guide
•Virtual ECUs - Landing page